Creating Loop/Table in email body in OIC

In this blog we will discuss how to create a Table in Email body of OIC, where the rows are dynamically populated. As this is not a functionality that is available out of the box hence we have to write some custom logic for it.

Below are the steps with which we can achieve it:
Step1: Create an App-Driven Integration and name it Custom_Email_Notification

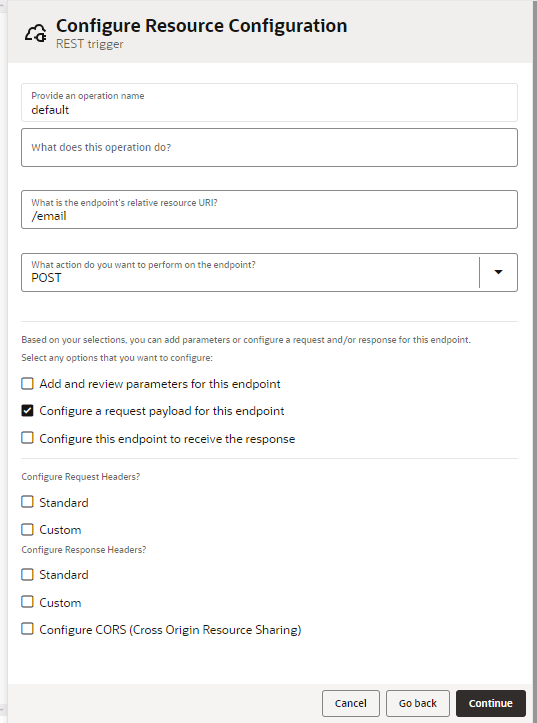
Step2: Add a REST Connection as the Trigger and configure it as a one way call( as we don’t want the response but want an email notification)
Provide the below details:
Name: REST_TRIGGER
Resource URI: /email
Method: POST
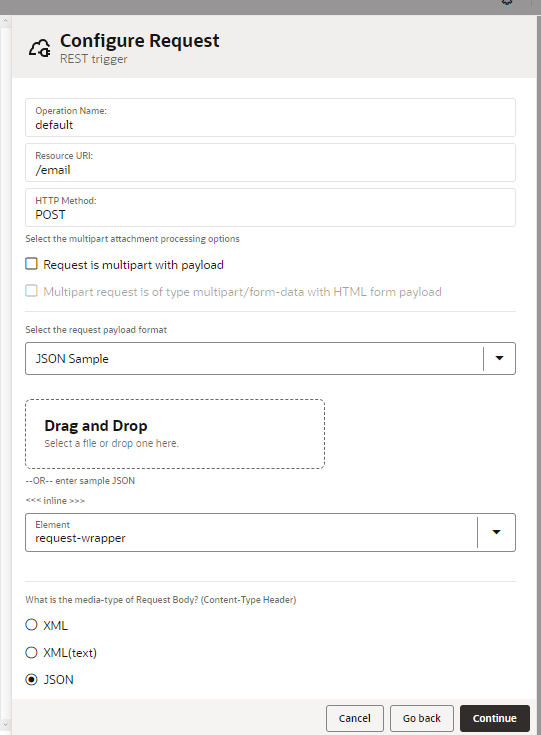
REST SAMPLE:
{
  "Request": [
    {
      "AttributeName": "String",
      "AttributeValue": "String"
    },
    {
      "AttributeName": "String",
      "AttributeValue": "String"
    },
    {
      "AttributeName": "String",
      "AttributeValue": "String"
    }
  ]
}
Step3: We are going to populate the table with the data coming in ‘AttributeName’ as the Column 1 data and ‘AttributeValue’ as Column 2 data.
For that first we will initialize the table with the table headers “MESSAGE_QUAL” and “MESSAGE” by creating a variable ‘Tablebody’ with the below expression:
'<table MsoNormalTable border=1 cellpadding=0>
	<tr>
		<th>MESSAGE_QUAL</th>
		<th>MESSAGE</th>
	</tr>'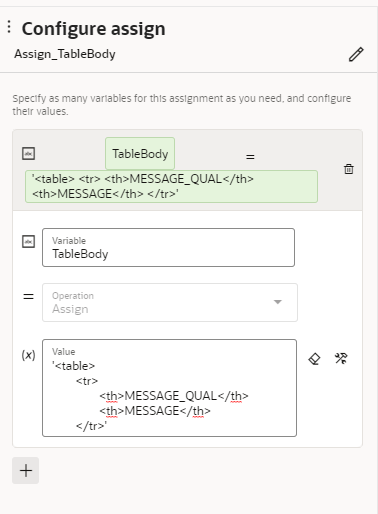
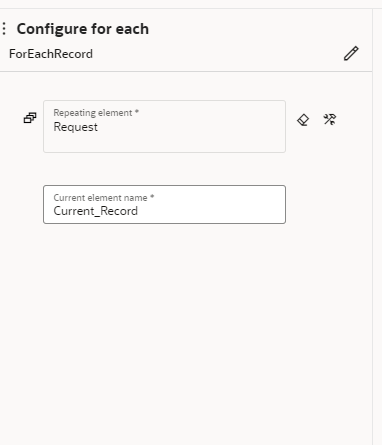
Step4: Now we will add a for-each loop in the canvas to iterate over the repeating element.
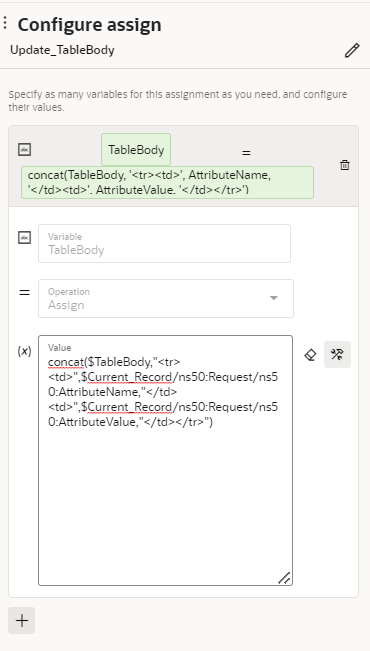
Step5: Inside the For-Each loop add an Assign activity and inside the activity update the previously created variable ‘Tablebody’ with the below expression:
concat($TableBody,"<tr><td>",$Current_Record/ns50:Request/ns50:AttributeName,"</td><td>",$Current_Record/ns50:Request/ns50:AttributeValue,"</td></tr>")For each Iteration this assign activity will concat the data of the previous iteration with the current one and hence we will get a new row for each iteration.
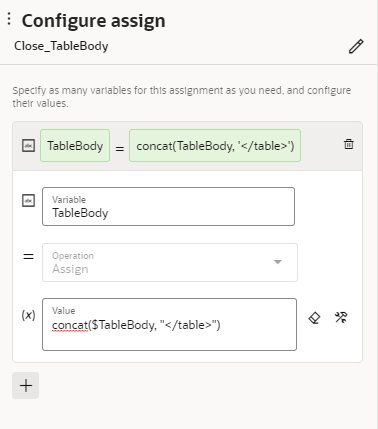
Step6: Outside the For-Each loop add one more assign activity and inside that activity update the value of ‘Tablebody’ with the below expression
concat($TableBody, "</table>")Here we are closing the table.
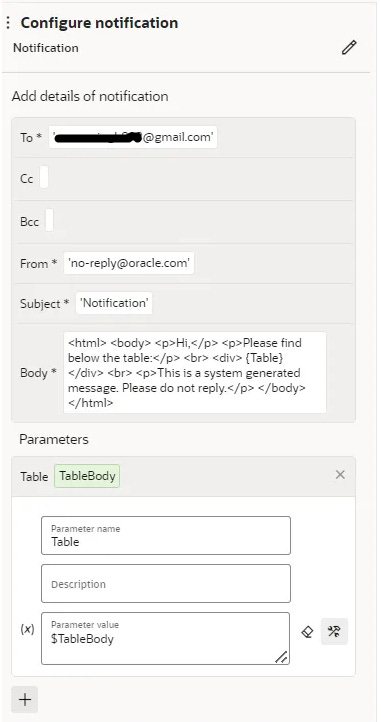
Step7:Add a Notification activity and configure it as below:
To: <email address>
From: 'no-reply@oracle.com'
Subject: 'Notification'
Body:
<html>
	<body>
		<p>Hi,</p>
		<p>Please find below the table:</p>
		<br>
		<div>
			{Table}
		</div>
		<br>
		<p>This is a system generated message. Please do not reply.</p>
	</body>
</html>Parameters:
Name: Table
Value: $TableBody
Your Integration Should Look Something like this
Now Lets Activate and Test
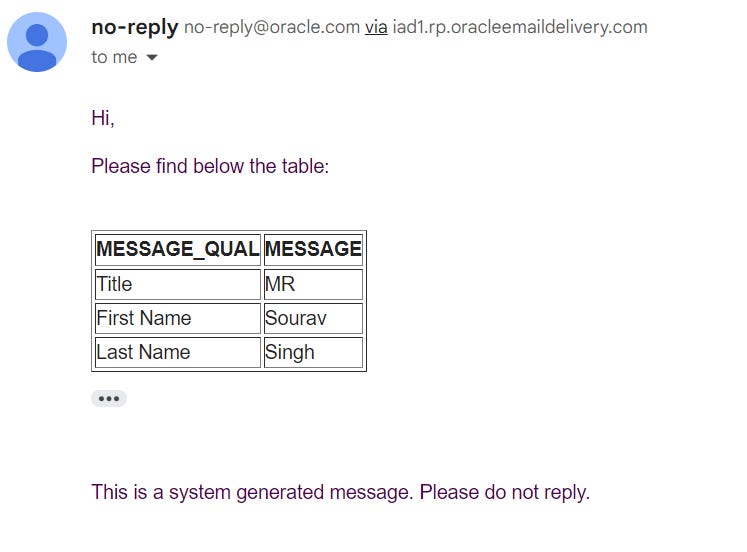
Below is the Request I sent to the Integration:
{
  "Request": [{
    "AttributeValue": "MR",
    "AttributeName": "Title"
  }, {
    "AttributeValue": "Sourav",
    "AttributeName": "First Name"
  }, {
    "AttributeValue": "Singh",
    "AttributeName": "Last Name"
  }]
}
And below is the email notification I received: